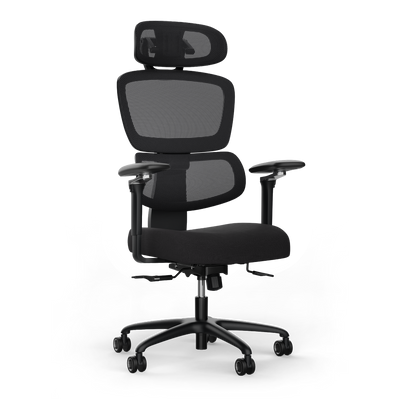
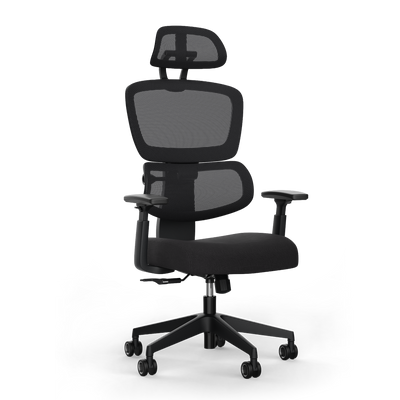


Adjusting your office chair ergonomically: A guide to the perfect sitting position

Adjusting your office chair correctly is the crucial first step to a healthy workspace. You adjust the seat height, seat depth, and backrest to your body measurements so that you sit ergonomically. This process only takes a few minutes but has a significant, long-term effect on your well-being and concentration.
Why proper chair adjustment is important
The correct adjustment of your office chair is more than a matter of comfort. It is the basis for preventing health problems caused by prolonged sitting. An incorrect posture strains the spine, leads to tension, and can impair your concentration.
An ergonomically correct sitting position supports the natural S-shape of your spine. This relieves pressure on the intervertebral discs and prevents lower back pain. At the same time, good posture improves blood circulation and oxygen supply to the muscles. This helps against rapid fatigue.
The consequences of incorrect adjustment
The risks of consistently incorrect sitting posture are documented. Statistics show that over 61.3% of German office workers complain about back pain at least once a year. Another study found that over 95% of chairs in German offices are incorrectly adjusted. The strain on the back and neck is often unnecessarily high.
Investing a few minutes in correct chair adjustment is a direct investment in your long-term health. It's about proactively preventing damage rather than treating symptoms later.
The advantages of an ergonomic setup
When you set up your workplace correctly, you will notice clear advantages. These go beyond mere pain avoidance.
- Increased productivity: A comfortable and supportive sitting position allows you to concentrate longer without physical distractions.
- Improved posture: You train a healthy posture that also has a positive effect on your body outside the office.
- Reduced risk of injury: The relief of joints and muscles minimizes the risk of chronic complaints such as Repetitive Strain Injury Syndrome (RSI), also known as mouse arm.
The following steps show you how to optimally adjust your chair. An ergonomic office chair is only part of the solution. Our guide shows you how to set up your entire workplace ergonomically.
The correct starting position as a basis
Before you use a lever on your chair, find your neutral, stable starting position. Only when this foundation is in place will all further adjustments work. Your feet are the crucial anchor point for a healthy posture.

Sit consciously on your chair so that your pelvis touches the backrest. Both feet are firmly and flat on the floor. Check that your knee and hip joints form an angle of approximately 90 degrees. Your thighs should be parallel to the floor or slope slightly downwards.
This is the first step that defines the relationship between your body, the chair, and your work surface. This basis is the prerequisite for being able to adjust your office chair ergonomically.
The role of the desk
The height of your desk also plays a role. If the table is too high, many people raise their chair. The result is that their feet dangle in the air. This causes instability and strains the lower back.
A height-adjustable desk is the ideal complement. It allows you to first adjust the chair perfectly to your body and then adjust the table height to this optimal sitting position. This way, your forearms and the tabletop form a straight line without you having to shrug your shoulders.
The order is crucial: always adjust the chair to your body first, never to the desk. The table must conform to your posture, not the other way around.
Checklist for your neutral base
Go through these points before you start with the fine adjustments. Only then will you create a stable foundation.
- Foot contact: Both feet are completely and flat on the floor. The legs are not crossed.
- Knee position: There should be about two to three fingers' width between your hollow of the knee and the front edge of the seat.
- Angle: Your knee and hip joints have an open angle of 90 degrees or slightly more.
- Back contact: Your lower back has full contact with the backrest.
- Shoulders: Your shoulders are loose and relaxed.
If this base is correct, you can continue. The principles for a healthy posture are fundamental. Our article on sitting correctly at your desk goes into more detail. Once your starting position is right, you begin with the fine adjustment of seat height, depth, and backrest.
Correctly adjusting seat height and seat depth
Once your basic posture is correct, it's time for the details. Seat height and seat depth are the foundations for an ergonomic setup. They are the basis for the healthy S-curve of your spine and optimal blood circulation in your legs.

The correct order is important: always first take care of the seat height. Only when this is adjusted to your leg length does it make sense to adjust the seat depth.
First find the correct seat height
The ideal seat height depends on the length of your lower legs, not the height of your desk. The goal is for your feet to be flat on the floor while your thighs slope slightly forward. This gently tilts your pelvis forward, which supports the natural shape of your spine.
Here's how to proceed:
- Find the lever: The lever for the gas spring is usually located on the right side under your seat.
- Relieve the chair: Stand up briefly or lift your weight to relieve the chair, and pull the lever. The seat will move all the way up.
- Lower and position: Sit back down and press the lever again. Slowly lower the seat until your feet are firmly and fully on the floor.
Your knees should now be slightly lower than your hips. An open angle of approximately 100 to 110 degrees in the knee joint is ideal. This slightly sloping position of the thighs prevents pressure on their underside and ensures good blood circulation.
A common mistake: The seat height is adjusted to the tabletop. The seat height is determined exclusively by your body. If you have a height-adjustable desk, you adjust it to your optimal sitting position only afterwards.
Then optimally adjust the seat depth
When the height is correct, it's time for the seat depth. This setting ensures that your entire thigh is supported without pinching the blood circulation in the hollow of your knee. An incorrect depth leads either to pressure points or to your lower back not finding support.
On high-quality chairs, you will often find the lever for this on the side under the seat. Sometimes it is also a rotary knob.
To find the correct depth, there is a simple method: the three-finger rule.
- Slide your buttocks all the way back until you feel the backrest.
- Now slide the seat forward or backward so that there are about three fingers' width of space between the front edge of the seat and your hollow of the knee.
This small distance is crucial. It guarantees that no nerves or blood vessels in the hollow of the knee are pinched. At the same time, you have enough support surface so that your body weight is evenly distributed. This avoids pressure points and ensures that your lower back always has contact with the backrest.
Checklist for your ergonomic chair adjustment
This table will help you quickly check your settings.
| Setting | Optimal result | Instructions and test method |
|---|---|---|
| Seat height | Feet flat on the floor, thighs slightly sloping. | Knee joint angle is greater than 90 degrees. Knees are slightly lower than hips. |
| Seat depth | Full contact with the backrest, without pressure in the hollow of the knee. | 2–3 fingers' width between the front edge of the seat and the hollow of the knee. |
If you have correctly adjusted these two core points, you have completed most of the journey to an ergonomic sitting posture. You have created the basis on which all further adjustments are built.
Adjusting the backrest and lumbar support
Seat height and seat depth are the basis. Now we'll focus on the core elements for a healthy back. The backrest and lumbar support are crucial for relieving your spine and supporting an upright posture.

These parts are not just simple leaning surfaces. They are active helpers that, when adjusted correctly, support your core muscles and prevent fatigue. A wrongly positioned support can do more harm than good.
Precisely positioning the lumbar support
The lumbar support is the curve in the lower part of the backrest. Its task is to support the natural S-curve of your lumbar spine. It prevents you from slouching into a rounded back during the day.
Finding the perfect position is easy. The strongest curve of the support belongs exactly at the height of your waistband. This is where the natural curvature of your lumbar spine is located.
- Adjust height: On most good office chairs, the entire backrest or the support itself can be adjusted in height. Slide it so that the support rests exactly in your lumbar curve.
- Adjust depth: Premium models often offer depth adjustment. Here you can adjust the pressure so that you feel a clear but comfortable support. There should be no uncomfortable pressure point.
The most common mistake is a lumbar support that is set too high. It then presses against the thoracic spine and achieves the opposite of what it is supposed to. The support belongs in the lower back, not in the middle.
If your chair does not have an integrated support, a back cushion can be an effective alternative to provide this function.
Adjusting the recline tension for dynamic sitting
Another central aspect for being able to adjust an office chair ergonomically is the resistance of the backrest. Sitting rigidly for hours is harmful to the back. Your body needs movement to supply nutrients to the intervertebral discs and keep the muscles fit.
The resistance of the backrest should gently support your movements, but not restrict them. You should be able to lean back effortlessly without feeling like you are tipping over backwards. At the same time, the backrest must build up enough counter-pressure to accompany you when you straighten up again.
- Release lock: Make sure that the tilt or synchronous mechanism of your chair is not locked.
- Adjust resistance: Use the rotary knob, which is usually located under the seat. Turn it until the counter-pressure matches your body weight.
- Test: Lean back a few times. The setting is perfect when your feet remain firmly on the floor and the backrest follows your movements smoothly.
This dynamic setting encourages small, unconscious movements while sitting. This activates the core muscles, improves blood circulation, and effectively prevents tension.
A study by the FH Gesundheitsberufe Oberösterreich has shown that the use of active chairs leads to a reduction in back pain (76%) and an improvement in inertia (37%).
Armrests and headrest: The finishing touches for your ergonomics
Seat, backrest, and lumbar support are adjusted. Now comes the fine-tuning. Armrests and headrests are often neglected but are crucial for relieving your shoulder and neck area. They complete your ergonomic setup.

Incorrectly adjusted armrests are a common cause of tension. If they are too high, you unconsciously pull your shoulders up. If they are too low, your shoulder girdle sags. In both cases, your muscles do unnecessary work.
Aligning the armrests precisely
The goal is a neutral, relaxed posture for your arms and shoulders. The height of your armrests should be oriented towards the tabletop. This creates a continuous, flat surface for your forearms.
Here is the proven procedure:
- Adjust height: Adjust the armrests so that they are exactly at the same height as your tabletop. Your forearms should rest loosely on them.
- Check angle: Ideally, your upper and lower arms should form an angle of 90 degrees or slightly more.
- Shoulder check: Make sure your shoulders hang loosely downwards. They should neither be pushed up nor pulled down.
The armrests bear a significant part of the weight of your arms. This directly relieves the neck and shoulder muscles and can prevent headaches and neck tension.
Using the headrest correctly
A headrest is not a pillow for the whole day. Its main task is to support your head and neck when you lean back or take a short break. It is designed to prevent you from overstretching your cervical spine and thus provide relief.
When adjusting, the aim is to create a support function without pushing the head forward in normal operation.
- Position height: Adjust the headrest so that its curve supports your neck or the lower part of your occiput. It should gently support the natural S-curve of your cervical spine.
- No constant contact: In a normal, upright working posture, your head should not touch the support at all or only lightly.
The correct adjustment of these two elements is the last step to being able to adjust your office chair ergonomically. They ensure complete relief of the upper body and help you maintain a healthy posture even on long working days.
Typical adjustment mistakes and how to avoid them
Even a very good office chair is useless if it is incorrectly adjusted. An incorrect adjustment is uncomfortable and can lead to postural damage in the long run. It is often small details that make the difference between support and strain.
Many people repeatedly make the same mistakes, but these can be easily avoided. If you know these pitfalls, you can take targeted countermeasures.
The wrong order: First the chair, then the desk
The most common mistake is to adjust the chair to the desk and not to one's own body. Many people adjust the seat height so that their arms rest comfortably on the tabletop and lose contact with the floor. Their feet then dangle in the air.
A basic rule: Always adjust the chair to your body first. Only then comes the desk. Your feet are the foundation for a stable and healthy posture.
Another problem is a misplaced lumbar support. It is often pushed too high because it feels comfortable at first.
- Incorrect: The support presses into the middle of your back, above the waistline. This creates an unnatural curvature and can strain the upper back or shoulders.
- Correct: The strongest curve of the support belongs exactly at the height of your waistband. Only then does it support the natural S-curve of your lumbar spine.
Static sitting and raised shoulders
Many people lock the backrest in a rigid position and wonder about back pain. Dynamic sitting is important to supply nutrients to your intervertebral discs and keep your muscles active.
Use the mechanism. Adjust the backrest's counter-pressure so that it gently follows your movements, but still supports you.
Incorrectly adjusted armrests are also a cause of tension in the shoulder and neck area.
| Mistake | What happens in the body? | The correct adjustment |
|---|---|---|
| Armrests too high | You unconsciously raise your shoulders. This leads to neck pain. | Armrest at tabletop height, so your shoulders remain loose and relaxed. |
| Armrests too low | Your upper body sags to the side, which promotes a lateral curvature of the spine. | Adjust the height so that your forearms rest loosely at a 90-degree angle. |
If you avoid these typical mistakes, you will get the most out of your office chair. Make the correct adjustments consciously so that you relieve your body optimally when you want to adjust your office chair ergonomically.
An ergonomic workplace is an investment in your health and productivity. Discover the certified office chairs and height-adjustable desks from Deskspace and find the right solution for your office or home office. To the ergonomic solutions from DESKSPACE


